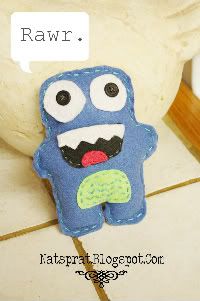
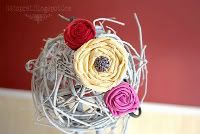
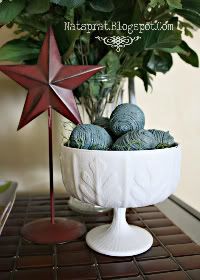
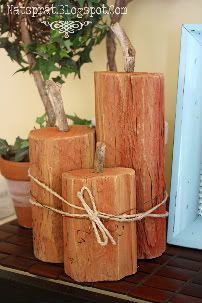
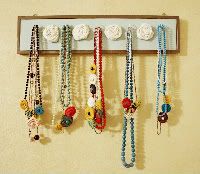
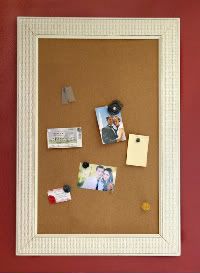
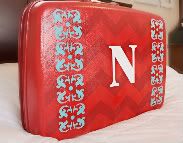
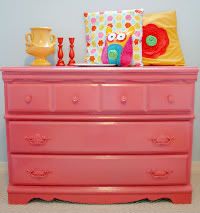
My newest creation. I am absolutely obsessed with it! There is an egg for each of my children, a bird to "guard" the nest, and a heart for all of my love! I'm thinking about making them and selling them! I think they'd do great with the holidays coming up! What do you think???
Wednesday, September 21, 2011
My New Creation
Posted by Natalie at 2:49 PM 10 people leaving some love!
Tuesday, September 20, 2011
No-Sew Felt Flower Pillow Tutorial
A while ago I did a guest post tutorial for this felt flower pillow and thought you guys would like it, too! It's SO easy and SO cute! I would love to make like..a hundred of them with different fabrics and colors of felt! In fact, I think I will. Ready for the tutorial? Here we go!
YOU WILL NEED:
3 sheets of felt
Scissors
Gluegun/gluesticks
A pillow you would like to dress up

Next, find 3 different sized things to trace. I used a sour cream lid, a cup, and a small can of diced green chilis. Use a marker that is just a little darker than the felt so you can see it.

On the first 2 sheets, you will trace 4 large circles and 3 small circles.

On the third sheet, you'll trace 6 medium circles and 3 more small circles.

Now, cut out all of your circles. You should have:

Next, cut them all in half.

Get your pillow, and lay out 9 of the large petals in a circle. Don't glue them yet...just get them situated to your liking.

Once you get them where you want them, THEN you can glue them on.

Layer on a second layer of LARGE petals.

Now a layer of MEDIUM petals...

And a second layer of MEDIUM petals.
Now, take 8 of your small petals and cut them in half.

Now, round off the corners.

Finish layering your small petals, ending with the ones you cut in half. Then, cut a circle of felt to fill in the hole in the middle. I traced a spool of thread, it was the perfect size! It will end up looking like this:

And now....give yourself a big pat on the back. :)
How cute would this be on a patterned pillow? Or you can also put a rolled fabric rosette in the center like this:

See, easy peasy. :) And, with the holidays coming up, now would be a great time to make some for Christmas presents! Everyone will be SO impressed! *wink wink*

See, easy peasy. :) And, with the holidays coming up, now would be a great time to make some for Christmas presents! Everyone will be SO impressed! *wink wink*
Posted by Natalie at 9:24 AM 12 people leaving some love!
Saturday, September 17, 2011
My New Blog Design {phew!}
Like my new blog design? Want to hear the story?
Here it goes.
It's after 1 a.m. and I have been sitting at the computer for about 3 hours trying not to hyperventilate or throw the monitor. Silly me, I just wanted to try on a few new blog backgrounds. It's like...trying on shoes, right? No big deal...no serious commitment. Well, one of them I "tried on" completely scrambled my blog and my posts weren't showing up or anything. SO, luckily, before I had "tried on" other blog templates and backgrounds I saved the blog html to my hard drive and was able to start from scratch. Well, in the meantime, I stumbled across an AMAZING blog...who you've probably heard of...
(Dearest Kevin and Amanda...I love you.)They had a WONDERFUL post on how to design your own blog background! So...I got to work. And it was hard. And fun. Which, basically is fard. (can you tell it's after 1 a.m.?)
So, they also have FREE digital mini scrapbooking kits that you can download, which you need if you are going to design your own blog background. And come on...you know you do. It's kind of the same feeling as going somewhere and seeing someone that's wearing the same outfit as you. "Awwww man....she has the same dress. And dang...it looks SO much better on HER!"

*Awwwwkward*
Well, thanks to their amazing tutorial on how to design your own blog, I have my own {unique} blog design that I absolutely love!
Also, here is another great website for free digiscrap downloads:
Shabby Princess.com
So...Whadda'ya think?
Wadda'I think? I think I'll go to bed now. :)

Posted by Natalie at 8:11 PM 5 people leaving some love!
Thursday, September 15, 2011
Trash into Treasure
I am totally kicking myself for not taking before pictures of this...I was just so darn anxious to turn it into something amazing! I found this for $1 at the thrift store. It had a really ugly picture of Precious Moments dolls at the top and it was red. I was giddy about it as I brought it up to the register...sometimes I wonder what the cashiers are thinking when I bring things up to the counter so excited about them. "Man...I bet this chick's house is HIDEOUS." or "Man...this chick has horrible taste! UGH!"
But who cares. I thrive off of making beautiful things out of junk!

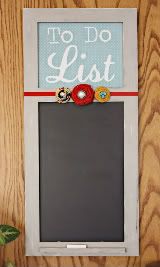
This is my latest creation! I painted the frame gray and antiqued it. Then I Mod Podged some paper over the ugly picture. Then, I cut out some vinyl letters with my handy dandy Silhouette
and stuck them on. I finished it off with some of my rolled fabric rosettes and some ribbon and that's it! This whole project only took me about an hour!
Hmmm...now I just have to get brave enough to write on it. If only my handwriting was as cute as the font....

Linked up to:

Posted by Natalie at 10:51 AM 7 people leaving some love!
Wednesday, September 14, 2011
I'm on FB!
Guess what! Guess what! (Say, "What?") You can now follow NatSprat on facebook! I don't know what took me so long...*smacking forehead*
Click HERE to find me!
Or, you can follow the "become a fan on facebook" button on my sidebar whenever you want! :)

Posted by Natalie at 9:02 AM 1 people leaving some love!
The Big Change
Well....I have a bit of news. I am no longer a homeschooler. This is kind of bittersweet for me. This year I tried to homeschool Aaron and Whitney...and if you remember my post on The "H" Word, I was pretty nervous about homeschooling 2 kids at the same time. Well, my fears were confirmed. I just couldn't do it! It was SO hard to try and bounce between the 2 kids and making sure they weren't falling behind. We weren't getting done with school until about 5:00 in the evening! It was awful. :( I turned into this totally stressed out monster and felt like all I did was nag, "Finish your math! Come on! We've been working on this for 2 hours!!!" And I just think Aaron couldn't handle me being his mom and his teacher at the same time. It was so frustrating! He is an interesting boy. His mind works like nobody I've ever seen.
Here was our conversation:
Me: "Aaron, today we're going to learn about an awesome color! Can you tell me what color your shirt is today?"
Aaron: "Um......it's red!"
Me: "Good! Now...can you tell me what color Lightning McQueen is?"
Aaron: "He's red!"
Me: "Good! Now, what color are our dining room walls?"
Aaron: "They're red!"
Me: "Great job! So, can you guess what color we're going to talk about today?"
Aaron: "Um.....BLUE!"
I swear...I didn't know whether to laugh or cry.
My husband had taken off two weeks, and his second week off was our first week of school. It was kind of embarrassing to have him home to witness the chaos. Me trying to help Whitney with her math AND help Aaron with his writing with Kate crying at my feet, "Mommy! Mommy! Hold you? Hold you? WAAAAAAAAH!!!" I wasn't dressed...I hadn't done my hair or makeup in three days, the house was a WRECK, dinner was never made on time, and I was in tears at least twice a day.
So, he came and sat with me and said the magic words. "Honey, I think we should look into putting the kids into public school. "
I was relieved and heartbroken at the same time. I know it's what was best for the kids, and I knew they'd LOVE school and everything would be okay. But...I was heartbroken that I couldn't handle it. It's embarrassing to admit....I failed. So many other parents homeschool like eight kids all at once! And I couldn't even handle two! Sigh.
So, the next day I took the kids to the school and enrolled them. I got to have a tour of the school and meet the teachers *who are just SO cute!* and I felt much better.
I couldn't sleep that night. I was so nervous. What if I slept in and they missed the bus? What if they won't wake up? What if I forget to put their lunches in their backpack? What if they start crying? What if I start crying? What will I do all day? Will they be okay???
The next morning we all said family prayer together, I took them both to school, walked them to their classrooms, gave them big hugs, told them I loved them and went back home. I didn't cry like I thought I would...I was more excited for them than anything. I knew they were in good hands and that they would make friends and have a blast! But, I couldn't wait for them to come home! I couldn't wait to see them get off of the big yellow bus and come running to me! And...they did. :)

I have to admit...I am LOVING the peace and quiet days I have now. I am LOVING going to the grocery store with only one kid to worry about. I am LOVING taking naps with Kate during her nap time. I am LOVING having a clean house. I am LOVING baking things so they can have after school snacks. I am LOVING having dinner ready on time. And I am LOVING hearing their stories of their adventures at school when they come home! They seem so happy and excited! And...I think everything is going to be okay.
Here was our conversation:
Me: "Aaron, today we're going to learn about an awesome color! Can you tell me what color your shirt is today?"
Aaron: "Um......it's red!"
Me: "Good! Now...can you tell me what color Lightning McQueen is?"
Aaron: "He's red!"
Me: "Good! Now, what color are our dining room walls?"
Aaron: "They're red!"
Me: "Great job! So, can you guess what color we're going to talk about today?"
Aaron: "Um.....BLUE!"
I swear...I didn't know whether to laugh or cry.
My husband had taken off two weeks, and his second week off was our first week of school. It was kind of embarrassing to have him home to witness the chaos. Me trying to help Whitney with her math AND help Aaron with his writing with Kate crying at my feet, "Mommy! Mommy! Hold you? Hold you? WAAAAAAAAH!!!" I wasn't dressed...I hadn't done my hair or makeup in three days, the house was a WRECK, dinner was never made on time, and I was in tears at least twice a day.
So, he came and sat with me and said the magic words. "Honey, I think we should look into putting the kids into public school. "
I was relieved and heartbroken at the same time. I know it's what was best for the kids, and I knew they'd LOVE school and everything would be okay. But...I was heartbroken that I couldn't handle it. It's embarrassing to admit....I failed. So many other parents homeschool like eight kids all at once! And I couldn't even handle two! Sigh.
So, the next day I took the kids to the school and enrolled them. I got to have a tour of the school and meet the teachers *who are just SO cute!* and I felt much better.
I couldn't sleep that night. I was so nervous. What if I slept in and they missed the bus? What if they won't wake up? What if I forget to put their lunches in their backpack? What if they start crying? What if I start crying? What will I do all day? Will they be okay???
The next morning we all said family prayer together, I took them both to school, walked them to their classrooms, gave them big hugs, told them I loved them and went back home. I didn't cry like I thought I would...I was more excited for them than anything. I knew they were in good hands and that they would make friends and have a blast! But, I couldn't wait for them to come home! I couldn't wait to see them get off of the big yellow bus and come running to me! And...they did. :)

I have to admit...I am LOVING the peace and quiet days I have now. I am LOVING going to the grocery store with only one kid to worry about. I am LOVING taking naps with Kate during her nap time. I am LOVING having a clean house. I am LOVING baking things so they can have after school snacks. I am LOVING having dinner ready on time. And I am LOVING hearing their stories of their adventures at school when they come home! They seem so happy and excited! And...I think everything is going to be okay.

Posted by Natalie at 7:46 AM 10 people leaving some love!
Friday, September 9, 2011
{Classic Vintage Rustic Reception}
My brother Matt got married a few weeks ago. They had a GORGEOUS reception up at Sundance in Utah. Oh my gosh, have you ever been to Sundance??? If not, you MUST go. Their reception theme was...well...the only way I can think of to describe it was classy vintage rustic. And I am kicking myself for not taking any pictures while we were there. I was too busy chasing after my kids, eating, talking, dancing and just having a GREAT time!
A few weeks later we held an open house for them here at my parents house. Now, my parent's house is really cool. It was built in 1908, so it's sort of a classic victorian style brick house with pillars and all...it's beautiful. (Hmmm. I wish I had a picture of it.) Anyway...we kind of wanted to go with the same theme as their reception in Sundance. I was SO EXCITED to help with the decorations and stuff! Seriously, I thrive off of that sort of stuff.
So, to start out, I made this:

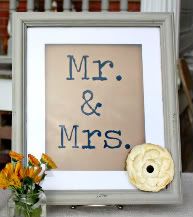
It is SO easy to do! All I did was paint and antique a shadow box frame (you can use any frame, though, it doesn't have to be shadowbox!) and I printed a big "Mr. & Mrs." onto some brown cardstock. (The font I used is called Traveling Typewriter from Dafont.com). I LOOOVE that font! Then, I put the printed paper into the frame, added a 3D paper flower I had cut out with my Silhouette, and that's it! This would be SUCH a fast, easy, inexpensive and AWESOME wedding gift for anyone! You could even just type their initials or their last name...so many possibilities!
I was also in charge of making cupcakes and a display for the cupcakes. Our local thrift store was having a rennovation sale, so everything I got was 25 cents! I bought a bunch of random plates and candlesticks and little bowl things and we glued them together to use as cupcake stands. They turned out so cute! ANNND, if you just glue them together with a glue gun instead of permanent E600, you can pop them apart and store them or wash them or whatever. When you're ready to use them again, just glue them together with the glue gun again.
I also made some cupcake toppers and wrappers with my Silhouette. They were a big hit!

I also cut out some strips of card-stock and circles with "R" for Reschke to make some napkin holders. We tied it all together with twine. So simple and so cute!

I think everything came together so well!

And, last but not least...a picture of the happy couple! They are SUCH goofballs, I just love them! Matt picked an AMAZING girl, she is a perfect addition to the family! :)


Linked up to:
Lolly Jane
Candace Creations
Tatertots & Jello

Posted by Natalie at 8:03 PM 8 people leaving some love!
Subscribe to:
Posts (Atom)