


I am SO excited to be doing a craft tutorial again! Thank you for being so patient with my absence! My little fingers have been busy making over 100 or your nest necklaces for the Hope For Stephen fund! I'll do a special post on all of that soon! I am still just in awe at all of your kindness...WOW. You guys ROCK!!!
Now, onto the next matter of business...
With the holidays fast approaching lots of people are already on the lookout for things to make as Christmas presents. Want to see what I have planned for some of the special little men in my life? Felt monster plushies! *rawr* These are so versatile, you can make it so many different ways! Add horns, a tail, give it eyelashes if it's in girl colors, change the teeth...whatever you want! I've included a basic pattern, but you can change it up however you like!
These take around an hour to make, so they are super fast and easy AND most importantly, super cute. (Yes, that's a lot of super.)
Heeere we go!
Supplies:

Monster Plush Parts page (save, fit to 8x11 page, print! If you want your plush to be bigger, then just scale the image larger)
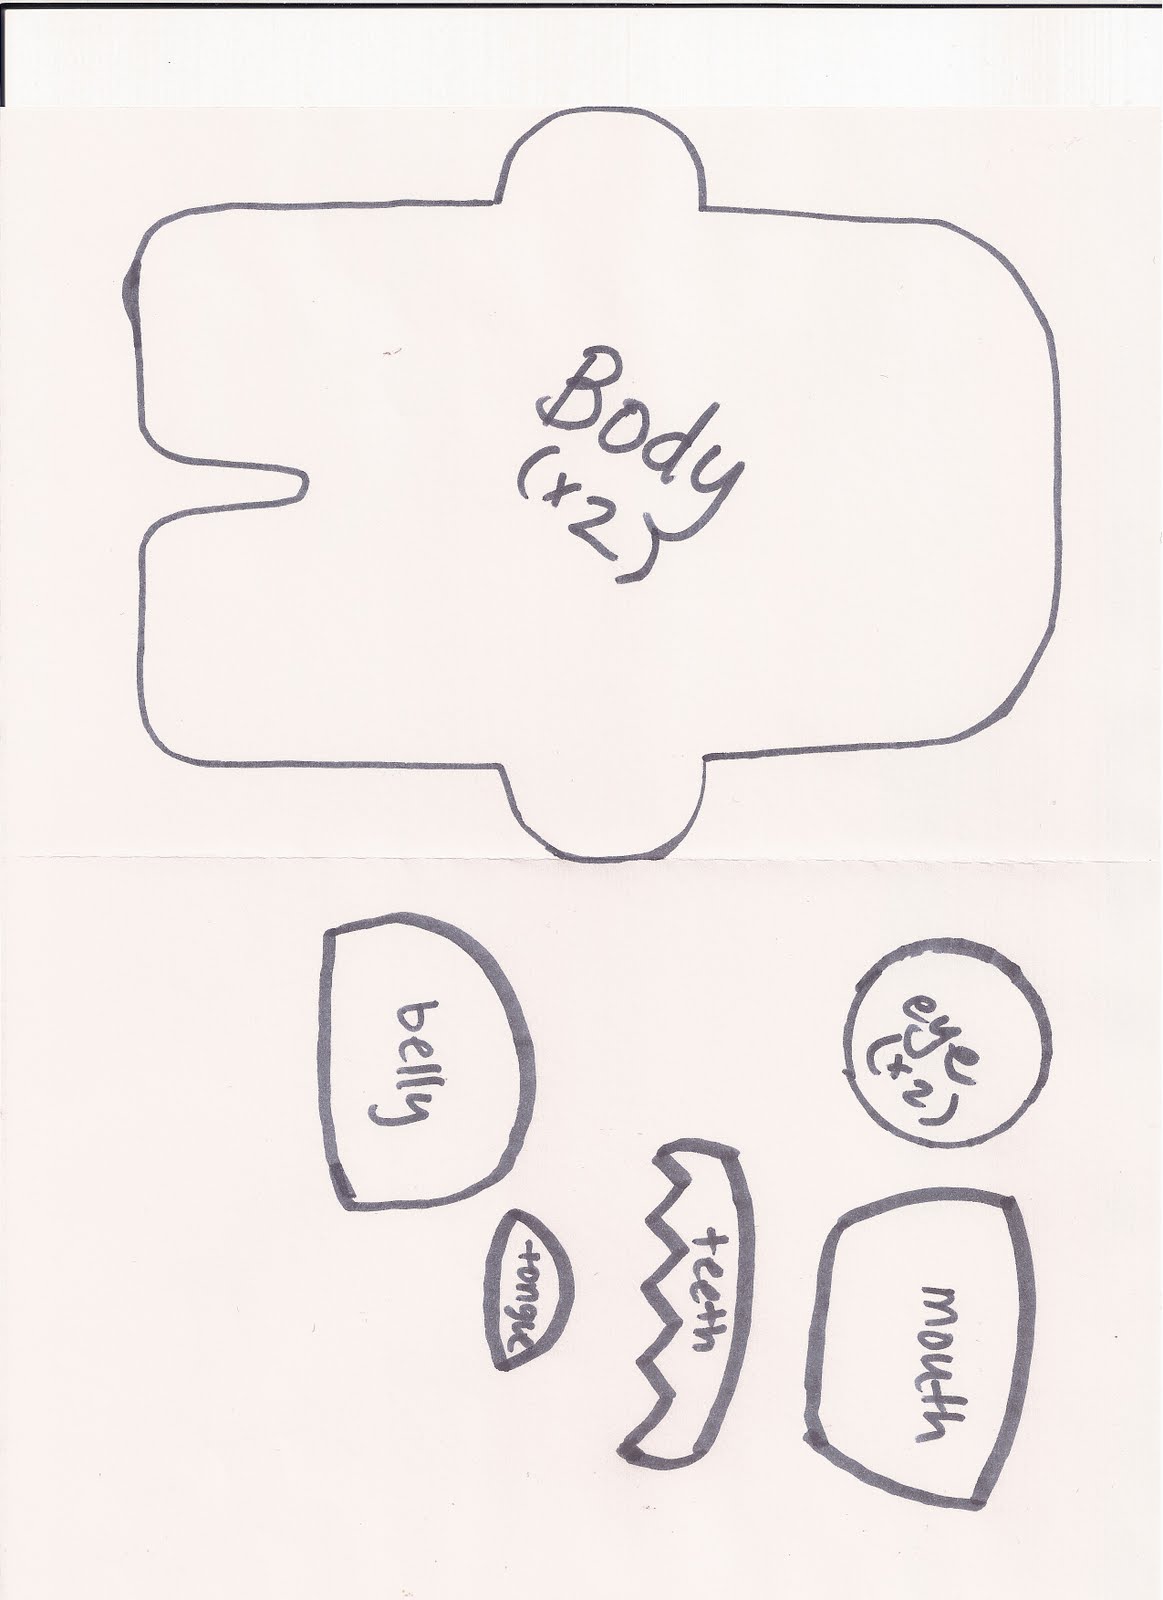
1 full sheet of felt (main body)
white felt (teeth and eyes)
pink or red felt (tongue)
black felt (mouth)
coordinating embroidery thread
sewing needle
scissors
glue gun (optional)
2 buttons for eyes
stuffing

Step 1: Trace all of the pieces and cut them out. Remember, you'll need 2 of the body and 2 of the eyes.

Now, you'll start stitching on the pieces. Now, if you don't want to sew them on, you can just use your glue gun to glue them on!

Now, stitch on the eyes. Move them around and see how you like them!


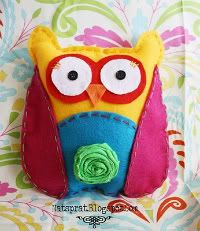
Now, you're going to start stitching at the top. Start above the middle of the eye and stitch all the way around. Again, if you don't want to stitch, you can just glue it together with your glue gun! See the felt owl plush tutorial for the directions on how to do that. ;)

Now, stop when you get to the middle of the other eye.

And get some practice for Thanksgiving and stuff it! Make sure to get it down into the legs and arms. Use a marker or something to get it in.

Now, finish stitching the top closed. A little tip: to make sure the end of the string doesn't hang out, after you knot the end, bring the needle through lower on the plush, pull it tight and snip it. The end of the thread will pop back into the plush so you can't see it!

Now, pose him artistically in your kitchen and make him make cute sounds. You're all done! :)

Linked up to
Someday Crafts
Trendy Treehouse
Thrifty Decorating
Tatertots and Jello
Family Ever After
Sew Country Chick
I Heart Naptime
DIY Home Sweet Home
The Girl Creative
Vintage Wanna Bee
Oops I Craft My Pants


15 people leaving some love!:
So cute! I'm gonna make me a pink one :)
Oh my heck that is SO CUTE! Thanks for the pattern! I want to make a bunch!
That is so fun!! Great idea :)
So cute Natalie! My boys would love these. I am thinking of making a handful in different colors that will be sitting under the tree amongst the other presents:)
So cute! I'm putting this on my FB page! :)
CUTE!!! I also want to make a pink one :D Thanks for the pattern, and idea!
Very cute!!
I featured this today on my blog:
http://craftingandcreativity.blogspot.com/2011/11/things-i-like-thursday-17.html
Who could be afraid of this adorable monster. Very cute.
Came over from TT&J, love this little monster. Thinking of having a monster party for my 1 year old son :) I am now your newest follower, check me out on.
http://rearrangingthefurnituredp.blogspot.com/2011/10/first-sewing-project.html
You have such a cute blog and that monster is TOO CUTE! I have a little sewing and fabric craft linky party I'm starting tomorrow and I was wondering if you could be so kind to stop by and post it? Thanks so much!
Sew Country Chick
Those are just adorable! What a great idea...who doesn't love a little monster? I'd be thrilled if you'd share it here:
http://oneartmama.blogspot.com/2011/11/shine-on-fridays-1.html
He is so adorable. Thanks for the tutorial. Thank you for linking up to More the Merrier Mondays.
Jamie
http://diyhshp.blogspot.com
Very nice! I am going to make one for a friend's son's birthday! Thanks for sharing
This is adorable - I love it!!!
This is super cute - great tutorial and thank you so much for the pattern.
I'd love to invite you to share this at my Thingamajig Thursday party going on now...http://radcrafter.com/2011/11/thingamajig-thursday-party-3/
Alida
Post a Comment