


If you read my Toy Room Reveal post from yesterday then you already know my {Pin}spiration Copycat project for this week! It's a chalk board top table!

Here is my original {Pin}spiration. :)
 So cute, huh! Well...I just HAD to have one! With a busy little 2 year old who likes to draw on EVERYTHING, it was kind of a must have.
Now...who wants a tutorial??? It is SOOOO easy, it's almost not right. Here's what you need.
1. A table/coffee table/whatever you want to turn into a chalkboard

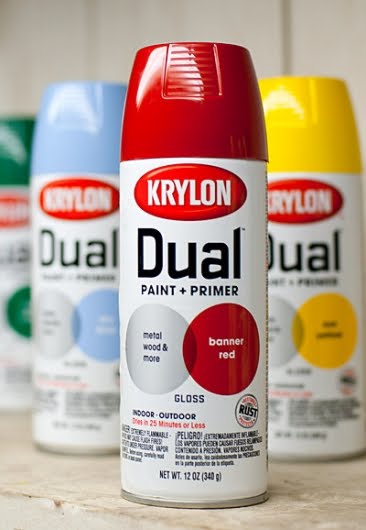
2. A base color of paint
I used Krylon Dual Spray Paint in Cherry Red. I love this stuff! It's spray paint AND primer in one! My wood was pretty dark and I didn't want to do a zillion coats of spray paint. This stuff worked PERFECTLY!
3. Painters Tape
I got the wide one. Since it's spray paint it gets everywhere! This stuff creates a nice ledge to deflect the chalkboard paint and keep it from "floating" all over the rest of the table.

4. Chalkboard Paint
I used trusty ol' Krylon. I didn't even know they made chalkboard SPRAY paint! It was a very pleasant surprise! They also have chalkboard paint in 1 quart cans...and I've seen tutorials where you just add powdered grout to whatever color of paint you want to use to make your own chalkboard paint. But...this was inexpensive and easy to use.
I used trusty ol' Krylon. I didn't even know they made chalkboard SPRAY paint! It was a very pleasant surprise! They also have chalkboard paint in 1 quart cans...and I've seen tutorials where you just add powdered grout to whatever color of paint you want to use to make your own chalkboard paint. But...this was inexpensive and easy to use.

Now, let the fun begin! First, I started spray painting in the garage. Then, I remembered that a certain handsome man who lives in my home and signed our wedding certificate told me to
NEVER EVER EVERRRRR
pretty please don't spray paint in the garage
Step 1: Spray paint your table with the base coat color. (Mine was the Cherry Red...)
TIPS:
- do a really light sanding of the table with a fine grit sand paper to make the first coat of paint stick best.
- don't make the coats too thick or they'll start to drip and get messy.
- do light, even swipes across the furniture
- make sure the coat is all or at least MOSTLY (okay...so I'm impatient!) dry before applying another.
- don't make the coats too thick or they'll start to drip and get messy.
- do light, even swipes across the furniture
- make sure the coat is all or at least MOSTLY (okay...so I'm impatient!) dry before applying another.

Step 2: Tape off the edges of the table with your painters tape. Make sure it's really pressed down well or the chalk board paint will seep into the crack!
Step 3: Spray on the chalk board spray paint! Use the same tips for spray painting as above.
Step 4: Wait for the paint to dry COMPLETELY...(yes, COMPLETELY). The can says 24 hours but mine was dry within 11 hours (yup...still impatient).
Step 5: Once it's completely dry, take a piece of chalk and rub it over the whole table. Then with a chalkboard eraser or a soft cloth wipe it off really well. This preps the chalkboard paint.

Step 6: You're DONE! Go buy some chalk and have fun! Yes, you WILL have to fight for a turn to draw on the table first. For real. And I won.
Want to see the first thing I drew???

Thanks for stopping by! Let me know if you have any questions!

Linked up to:
Someday Crafts
Trendy Treehouse
A Turtles Life For Me
Thrifty Decorating
Every Creative Endeavor
Tatertots and Jello


3 people leaving some love!:
Oh! I need to do that for my kids! Looks awesome!
What a great tutorial, thanks!
I love this idea! I would love for you to link up to Do Something Crafty Friday: http://seevanessacraft.com/2012/03/do-something-crafty-30/
Post a Comment