


Remember when I did the cupcake pin cushion giveaway? Remember how I promised to do a tutorial for the cupcake? Good. Because I totally forgot! But, I'm going to make it up to you now! So, because I love you SOOOOO much (and because I totally just found these pictures all ready to go *cough cough*) here is the promised tutorial. Enjoy!
YOU WILL NEED:
2 colors of felt: one for the wrapper and one for the frosting
glue gun/glue sticks
sewing machine/thread
stuffing (not the turkey kind...)
*plug in your glue gun to get it nice and hot. Nice for the glue...not for the fingers*
2 colors of felt: one for the wrapper and one for the frosting
glue gun/glue sticks
sewing machine/thread
stuffing (not the turkey kind...)
*plug in your glue gun to get it nice and hot. Nice for the glue...not for the fingers*
 Cut your strips. They will need to be 3-4 tall and about 8 1/2 inches long. (If the size isn't perfect, it totally doesn't matter. It'll still work great!)
 Get your sewing machine all threaded and ready to go. You will fold over your felt strip about every quarter of an inch and sew down the edge with an 1/8" seam allowance. Do this for the whole length of the strip.
 It will end up looking like this.
 Fold over the top edge about a quarter inch and sew it down using an 1/8 inch seam allowance.
 Do the same thing to the other side...
 And it will turn out like this. Decide how big around you want your wrapper to be and cut it to the size you want.
 Put the ends together and sew them together, remembering to do the back stitch at the beginning and the end of the stitch. Now you're done with the main wrapper part.
On to the sweet stuff! Mmmm. Frosting.
 Take one of the strips for the frosting and fold it in half from top to bottom, not lengthwise.
(I totally forgot to take pictures of this part apparently...ARRRGH!)
Start to roll the fabric into a cinnamon bun type thing, gluing a little as you go to hold it together. Don't use too much glue or it'll be hard to get your pins into it. Use your other strip and do the same thing until it's about the circumference as your wrapper.
See how it's kind of taller in the center like an ice cream cone? Try to get it like that. ;)
*****
 (Mmmmm....ice cream cone. Does anyone else hear a choir of angels singing? I must be hungry.)
*****
See how it's kind of taller in the center like an ice cream cone? Try to get it like that. ;)
*****
 (Mmmmm....ice cream cone. Does anyone else hear a choir of angels singing? I must be hungry.)
*****
 Now, stuff your frosting into the wrapper and glue around the edges to secure it. Awww, it's looking so nice and tasty!
 Cut a circle of felt the same size as the wrapper hole. Flip it over and put in your stuffing.
*tip: I ended up putting in some of those little clear glass rock things at the bottom to kind of weigh it down*
 Glue on the bottom! You can also use a piece of cardboard cut to the circumference of the wrapper to make it flat on the bottom.
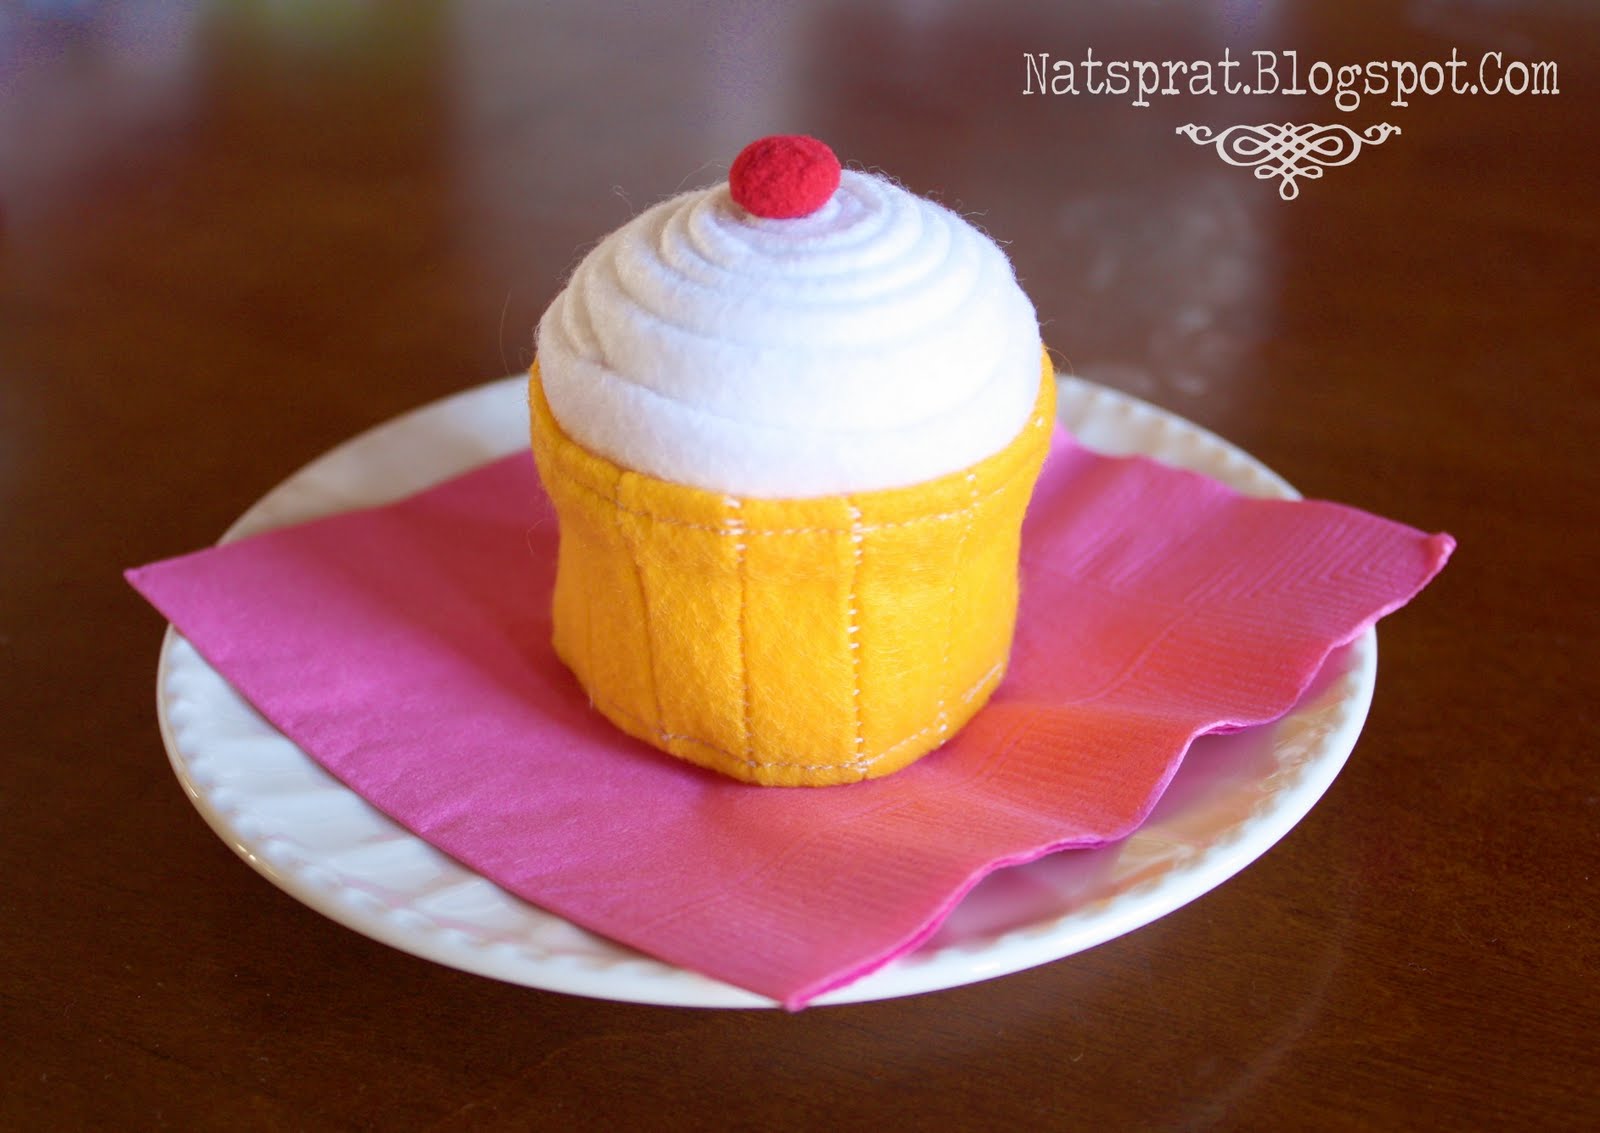
And Voila! You're done, and you have the CUTEST little pin cushion ever! If you want a cherry on top, just use a mini red pom pom! ;)
Now...I have GOT to go get me an ice cream cone. Buh-bye!

Submitted to:


Fingerprints on the Fridge


25 people leaving some love!:
Very cute! I may or may not have eaten an entire box of Breyer's ice cream by myself this week.
Omg I love this! Would you be interested in hosting my Tutorial Tuesday on my blog with a super cute tutorial of yours? I would love for u to!!! Email me: bkah83@yahoo.com
Oh my gosh! This is sooo stinking adorable.. not only is it handy.. but it makes me hungry without any of the calories! Love it!
How cute! That looks so much easier than the ones I made last year! Thanks for the tutorial!
Way too cute! I thought from the initial picture it was a real cupcake until I read "pin cushion"!! Very nice, precise work!
That is so stinkin' adorable! Love it!
So cute! I really need a pin cushion so I might have to try this. (Although I try to craft so I DON'T do too much late night snacking, I hope this cute pin cushion doesn't sabotage my plan! ;) )
This is SO cute and looks delicious! ;) Thanks for sharing the tut!
I would love for you to link up to my first linky party! {nifty thrifty sunday}
xoxo,
Vanessa
Super cute! Great tute! We would ♥ for you to link this up :)
:)Lolly Jane
lollyjaneboutique.blogspot.com
So freaking cute. I love it.
Love it! What a fun idea- oh and the pins look like little sprinkles, i just realized- brilliant. I want to make one, but first, I need to get ice cream too ;)
A-dorable!!
How am I not seeing this until now?? LOVE IT!! Seriously cute and you keep knocking these pictures out of the park! You need to have a photography tutorial or something or other for folks like me!
that is so cute...and makes me want an ice cream cone :)
Really adorable -- good enough to eat.
Congratulations, your Cupcake Pin Cushion tutorial made this week's top hits @ singingwithbirds.com. Come by, check it out and grab a button if you'd like. Thanks for sharing your fabulous post!
this is so cute. adorable. great blog!
kathryn
www.thedragonsfairytail.blogspot.com
LOVE this! I featured you on Make Something Mondays!! Come take a peek! Thanks so much!
~ Sarah
http://sarahndipities.blogspot.com/2011/04/hello-hope-everyone-had-wonderful.html
This is so great! Love it!
Jo-Anna
I looooooooove this. I love, love, LOVE crafts that look like food! I'm hosting a sweet treats party this weekend, crafts disguised as dessert are certainly welcome! hope to see you there :)
Ashton
www.somethingswanky.com
Hey, I needed to make a pincushion for a swap and I used your tutorial! It went perfectly, except that my sewing machine is possessed by a horde of demons, and I should have sewn the bottom because I apparently lack your hot glue skillz.
Still, your tute was great and very easy to follow. Thanks a million!
Here's the post in case you want to see a pic of my version:
http://real-redhead.blogspot.com/2011/07/pretty-ugly.html
This is just aDORable! Wow! Clever, cute, and simple. I'd be so excited if you'd link this up to my 'think pink' party! I'm your newest follower.
http://oneartmama.blogspot.com/2011/10/jewelry-for-cureand-giveaway.html
This is so awesome and cute.. How creative.. I am hosting Project Pink Blog day today and I would LOVE for you to link this up and share with all the lovely ladies please.. TY SO MUCH.. http://theartsygirlconnection.blogspot.com/2011/10/project-p-i-n-k-countdown.html
Darling and just what I needed to finish up my daughter's sewing kit for Christmas! Thank you!
Hi! I want to feature this on SewCanShe.com. Will you email me if it's okay? caoline@sewcanshe.com
Post a Comment